wordpress做小说网站企业如何进行品牌推广
ubuntu22.04@laptop OpenCV Get Started: 012_mouse_and_trackbar
- 1. 源由
- 2. mouse/trackbar应用Demo
- 2.1 C++应用Demo
- 2.2 Python应用Demo
- 3. 鼠标位置跟踪注释
- 3.1 注册回调函数
- 3.2 回调操作
- 3.3 效果
- 4. 使用轨迹栏调整图像大小
- 4.1 初始化轨迹栏&注册回调函数
- 4.2 回调操作
- 4.3 效果
- 4. 总结
- 5. 参考资料
- 6. 补充
1. 源由
鼠标指针和轨迹条是图形用户界面(GUI)中的关键组件。
如果没有这些关键交互组件,就无法真正考虑与GUI交互。
因此,结合演示代码了解OpenCV中鼠标和轨迹条的内置功能,对于程序交互来说至关重要。
2. mouse/trackbar应用Demo
012_mouse_and_trackbar是OpenCV通过鼠标指针和轨迹条与用户交互的示例。
2.1 C++应用Demo
C++应用Demo工程结构:
012_mouse_and_trackbar/CPP$ tree .
.
├── Mouse
│   ├── CMakeLists.txt
│   └── mouse.cpp
└── Trackbar├── CMakeLists.txt└── trackbar.cpp2 directories, 4 files
确认OpenCV安装路径:
$ find /home/daniel/ -name "OpenCVConfig.cmake"
/home/daniel/OpenCV/installation/opencv-4.9.0/lib/cmake/opencv4/
/home/daniel/OpenCV/opencv/build/OpenCVConfig.cmake
/home/daniel/OpenCV/opencv/build/unix-install/OpenCVConfig.cmake$ export OpenCV_DIR=/home/daniel/OpenCV/installation/opencv-4.9.0/lib/cmake/opencv4/
C++应用Demo工程编译执行:
$ cd Mouse
$ mkdir build
$ cd build
$ cmake ..
$ cmake --build . --config Release
$ cd ..
$ ./build/mouse
$ cd Trackbar
$ mkdir build
$ cd build
$ cmake ..
$ cmake --build . --config Release
$ cd ..
$ ./build/trackbar
2.2 Python应用Demo
Python应用Demo工程结构:
012_mouse_and_trackbar/Python$ tree .
.
├── requirements.txt
├── mouse.py
└── trackbar.py0 directories, 3 files
Python应用Demo工程执行:
$ workoncv-4.9.0
$ python mouse.py
$ python trackbar.py
3. 鼠标位置跟踪注释
3.1 注册回调函数
OpenCV提供了鼠标事件检测功能,用于检测各种鼠标操作。
代码上采用注册回调函数方式实现:
C++:
// highgui function called when mouse events occur
setMouseCallback("Window", drawRectangle);
Python:
# highgui function called when mouse events occur
cv2.setMouseCallback("Window", drawRectangle)
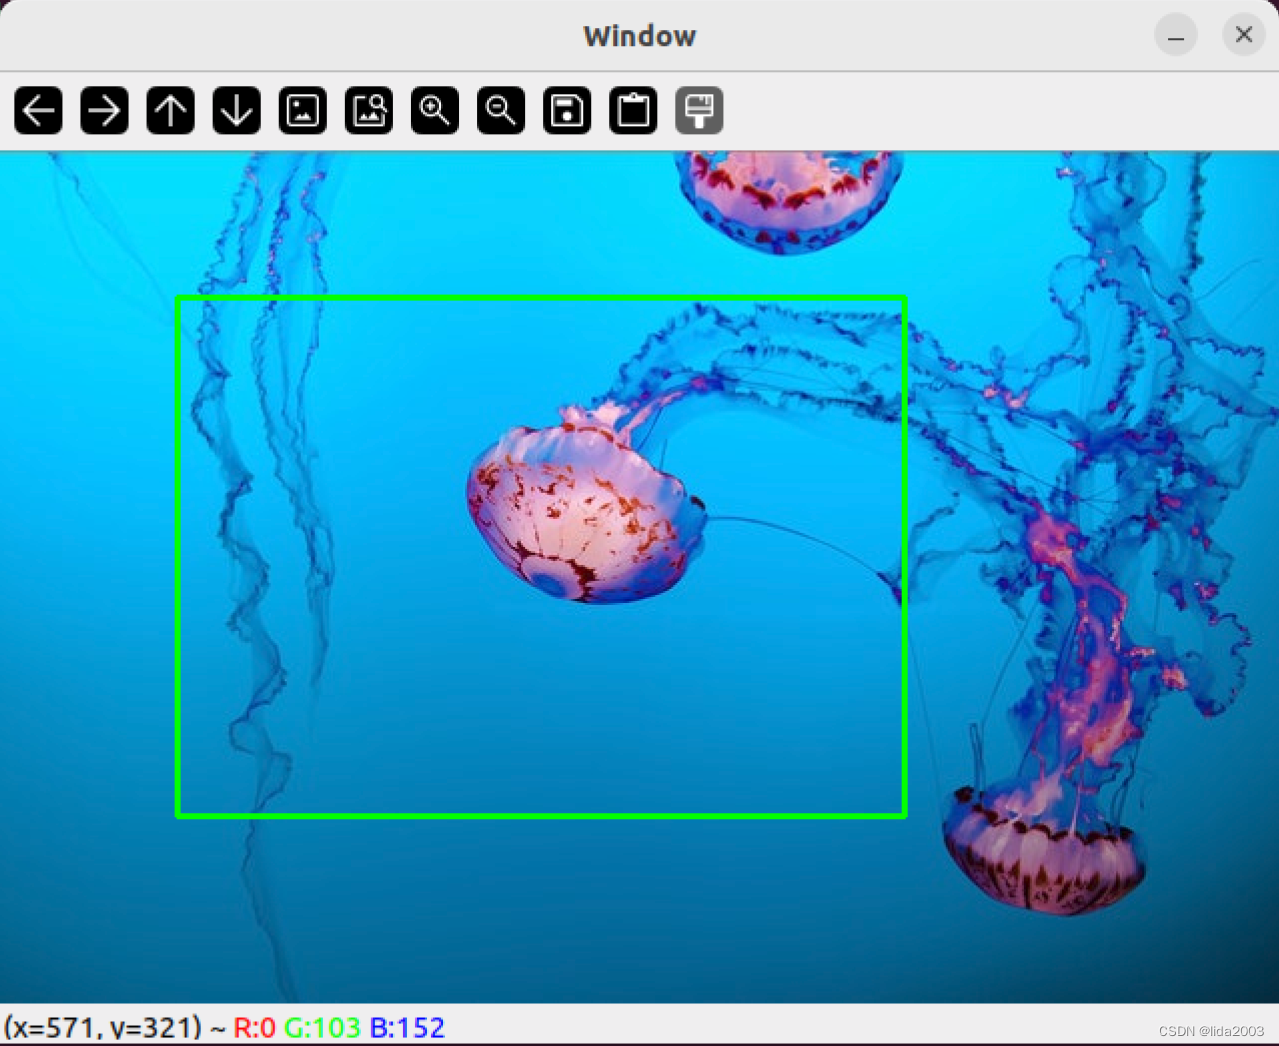
3.2 回调操作
当有鼠标操作时:
- EVENT_LBUTTONDOWN:记录左上角坐标
- EVENT_LBUTTONUP:记录右下角坐标,并更新图像
实现对左上角和右下角的框选,矩形框标注选择范围。
C++:
// Points to store the center of the circle and a point on the circumference
Point top_left_corner, bottom_right_corner;
// image image
Mat image;// function which will be called on mouse input
void drawRectangle(int action, int x, int y, int flags, void *userdata)
{// Mark the center when left mouse button is pressedif( action == EVENT_LBUTTONDOWN ){top_left_corner = Point(x,y);}// When left mouse button is releasedelse if( action == EVENT_LBUTTONUP){bottom_right_corner = Point(x,y);// Draw rectanglerectangle(image, top_left_corner, bottom_right_corner, Scalar(0,255,0), 2, 8 );// Display imageimshow("Window", image);}}
Python:
# Lists to store the points
top_left_corner=[]
bottom_right_corner=[]# Define drawRectangle function
def drawRectangle(action, x, y, flags, *userdata):# Referencing global variables global top_left_corner, bottom_right_corner# Action to be taken when left mouse button is pressedif action == cv2.EVENT_LBUTTONDOWN:top_left_corner = [(x,y)]# Action to be taken when left mouse button is releasedelif action == cv2.EVENT_LBUTTONUP:bottom_right_corner = [(x,y)]    # Draw the rectanglecv2.rectangle(image, top_left_corner[0], bottom_right_corner[0], (0,255,0),2, 8)cv2.imshow("Window",image)
3.3 效果
4. 使用轨迹栏调整图像大小
4.1 初始化轨迹栏&注册回调函数
创建轨迹栏对象时,代码上采用注册回调函数方式实现:
C++:
int maxScaleUp = 100;
int scaleFactor = 1;string windowName = "Resize Image";
string trackbarValue = "Scale";// Create Trackbars and associate a callback function
createTrackbar(trackbarValue, windowName, &scaleFactor, maxScaleUp, scaleImage);
Python:
maxScaleUp = 100
scaleFactor = 1
windowName = "Resize Image"
trackbarValue = "Scale"# Create trackbar
cv2.createTrackbar(trackbarValue, windowName, scaleFactor, maxScaleUp, scaleImage)
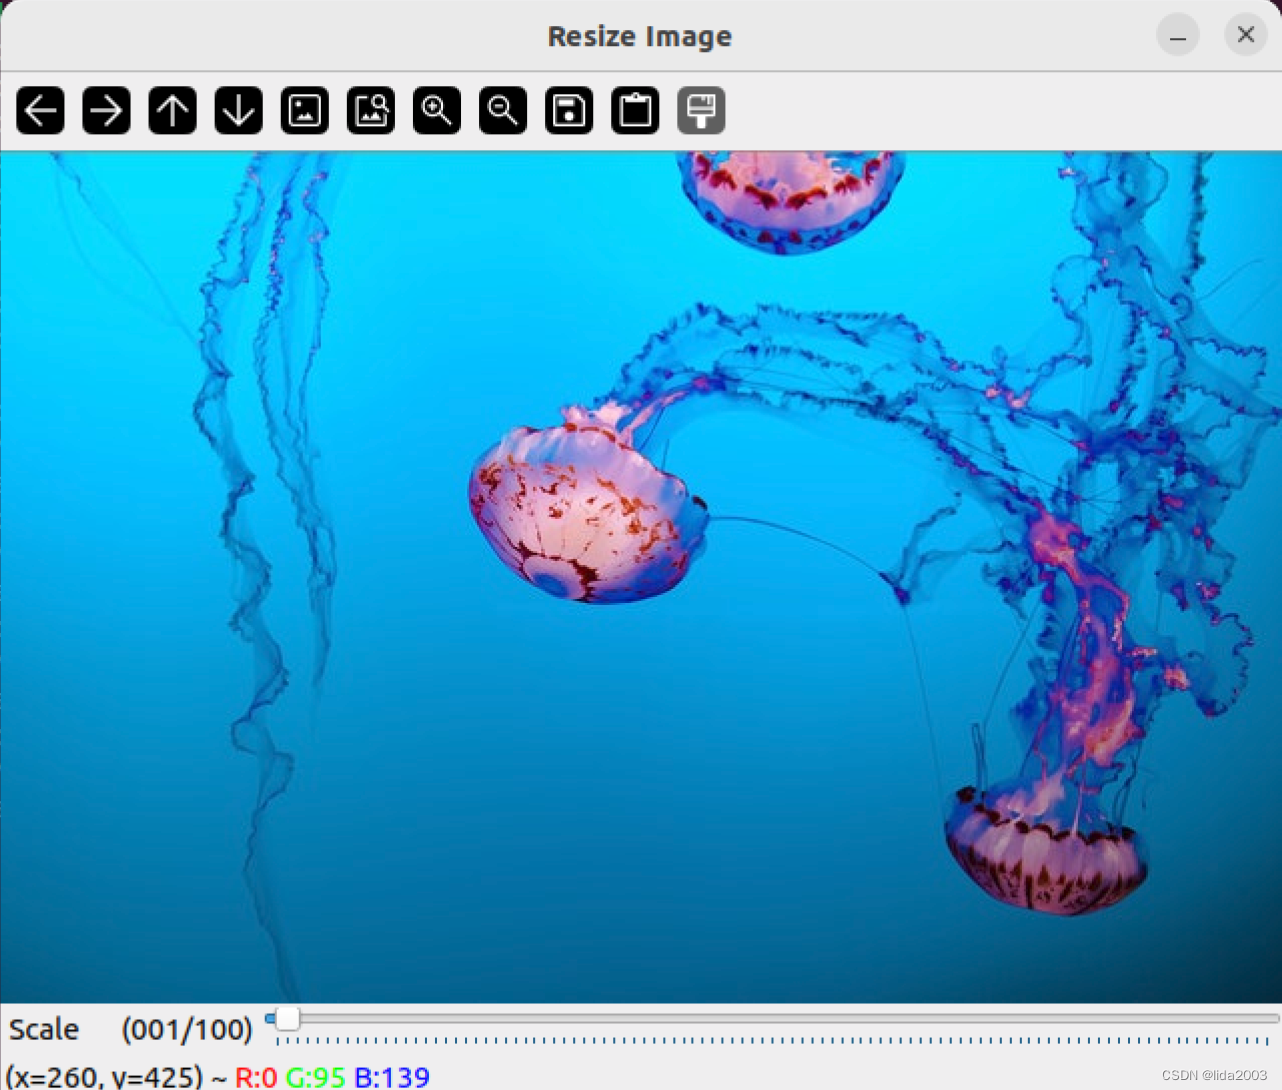
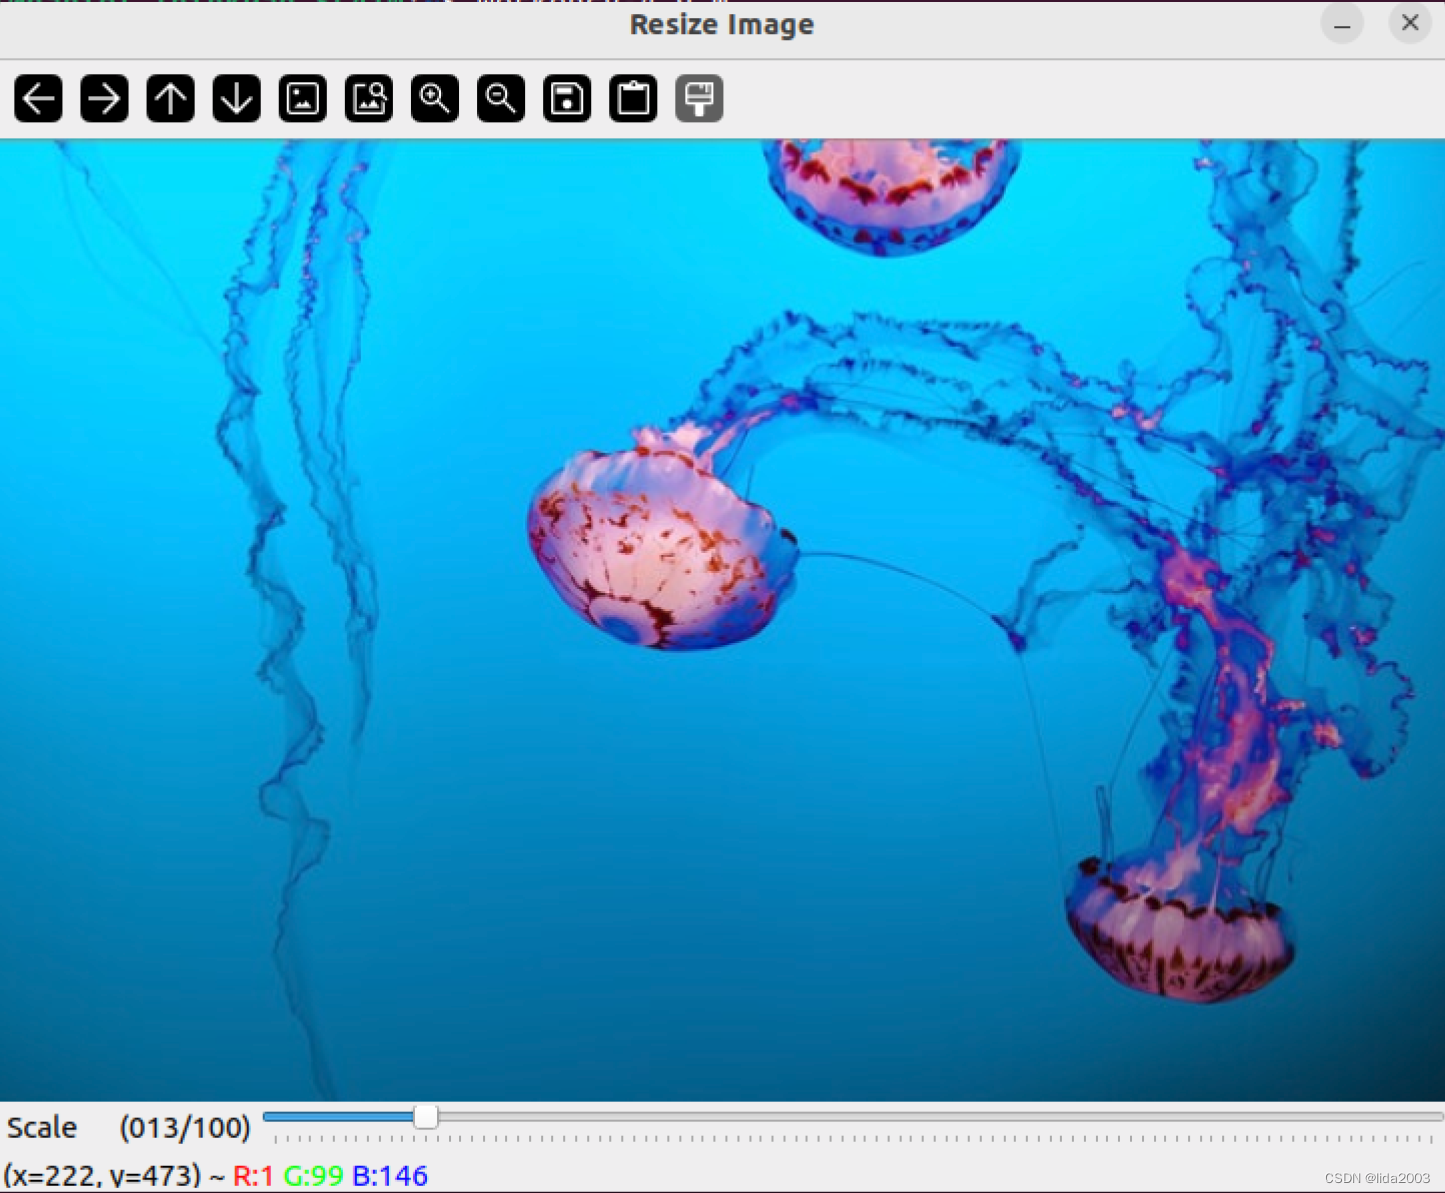
4.2 回调操作
当有拖动轨迹栏滑块时,调用回调函数。根据滑块位置,对图像进行比例缩放。
C++:
// Callback functions
void scaleImage(int, void*)
{// Read the imageMat image = imread("../../Input/sample.jpg");// Get the Scale factor from the trackbardouble scaleFactorDouble = 1 + scaleFactor/100.0;// Set the factor to 1 if becomes 0if (scaleFactorDouble == 0){scaleFactorDouble = 1;}Mat scaledImage;// Resize the imageresize(image, scaledImage, Size(), scaleFactorDouble, scaleFactorDouble, INTER_LINEAR);// Display the imageimshow(windowName, scaledImage);
}
Python:
# Callback functions
def scaleImage(*args):# Get the scale factor from the trackbar scaleFactor = 1+ args[0]/100.0# Resize the imagescaledImage = cv2.resize(image, None, fx=scaleFactor, fy = scaleFactor, interpolation = cv2.INTER_LINEAR)cv2.imshow(windowName, scaledImage)
4.3 效果
通过轨迹栏的拖动,实现图像的放大缩小。
4. 总结
本文通过设置setMouseCallback和createTrackbar注册鼠标操作回调函数和轨迹栏空间回调函数,实现对应的OpenCV图像操作。
- setMouseCallback(winname, onMouse, userdata)
- winname Name of the window.
- onMouse Callback function for mouse events. See OpenCV samples on how to specify and use the callback.
- userdata The optional parameter passed to the callback.
- createTrackbar( trackbarName, windowName, value, count, onChange)
- trackbarname Name of the created trackbar.
- winname Name of the window that will be used as a parent of the created trackbar.
- value Optional pointer to an integer variable whose value reflects the position of the slider. Upon creation, the slider position is defined by this variable.
- count Maximal position of the slider. The minimal position is always 0.
- onChange Pointer to the function to be called every time the slider changes position. This function should be prototyped as void Foo(int,void*); , where the first parameter is the trackbar position and the second parameter is the user data (see the next parameter). If the callback is the NULL pointer, no callbacks are called, but only value is updated.
- userdata User data that is passed as is to the callback. It can be used to handle trackbar events without using global variables.
5. 参考资料
【1】ubuntu22.04@laptop OpenCV Get Started
【2】ubuntu22.04@laptop OpenCV安装
【3】ubuntu22.04@laptop OpenCV定制化安装
6. 补充
学习是一种过程,对于前面章节学习讨论过的,就不在文中重复了。
有兴趣了解更多的朋友,请从《ubuntu22.04@laptop OpenCV Get Started》开始,一个章节一个章节的了解,循序渐进。