网站描述如何写利于优化知乎推广渠道
「OC」present和push操作区别以及混合推出的实现
文章目录
- 「OC」present和push操作区别以及混合推出的实现
- 前言
- present
- 用途
- while循环越级返回
- 通知越级返回
- 添加present动画
- push
- 模态视图和push视图混合跳转
- 操作一:控制器A`present`控制器B,控制器B再将控制器C`push`出来
- 操作二:控制器1push出控制器2,控制器2present控制器3,使用代理直接返回控制器1
- 总结
前言
在viewController的生命周期之中,我们探究了present以及push不同操作之中,生命周期的方法调用,以及在暑假的时候学习了如何实现自定义模态视图和自定义模态视图动画。因此我继续探究present以及push操作的相关区别,以及学习如何实现视图的混合推出。
present
用途
用简单的几行代码先展示present的用途
ViewController* vc = [[ViewController alloc] init];
[self presentViewController:vc2 animated:YES completion:nil];
对应的dismiss方法
[self dismissViewControllerAnimated:YES completion:nil];
对于我们的present来说,我们的返回和进入都是逐级进行的,代码如下
ViewController1.h:
#import <UIKit/UIKit.h>@interface ViewController1 : UIViewController@end
ViewController1.m:
#import "ViewController1.h"
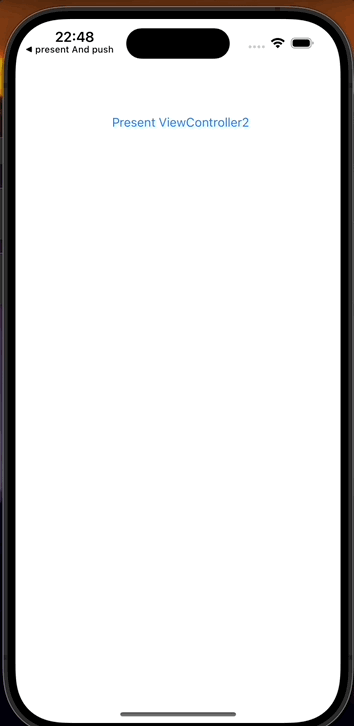
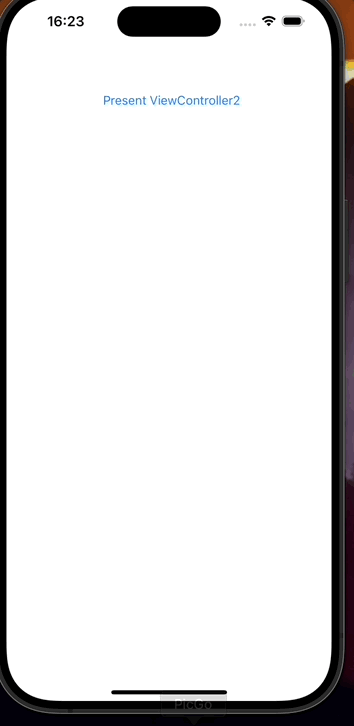
#import "ViewController2.h"@implementation ViewController1- (void)viewDidLoad {[super viewDidLoad];UIButton *presentButton = [UIButton buttonWithType:UIButtonTypeSystem];[presentButton setTitle:@"Present ViewController2" forState:UIControlStateNormal];[presentButton addTarget:self action:@selector(presentViewController2) forControlEvents:UIControlEventTouchUpInside];presentButton.frame = CGRectMake(100, 100, 200, 50);[self.view addSubview:presentButton];
}- (void)presentViewController2 {ViewController2 *vc2 = [[ViewController2 alloc] init];[self presentViewController:vc2 animated:YES completion:nil];
}@end
ViewController2.h:
#import <UIKit/UIKit.h>@interface ViewController2 : UIViewController@end
ViewController2.m:
#import "ViewController2.h"
#import "ViewController3.h"@implementation ViewController2- (void)viewDidLoad {[super viewDidLoad];UIButton *presentButton = [UIButton buttonWithType:UIButtonTypeSystem];[presentButton setTitle:@"Present ViewController3" forState:UIControlStateNormal];[presentButton addTarget:self action:@selector(presentViewController3) forControlEvents:UIControlEventTouchUpInside];presentButton.frame = CGRectMake(100, 200, 200, 50);[self.view addSubview:presentButton];
}- (void)presentViewController3 {ViewController3 *vc3 = [[ViewController3 alloc] init];[self presentViewController:vc3 animated:YES completion:nil];
}@end
ViewController3.h:
#import <UIKit/UIKit.h>@interface ViewController3 : UIViewController@end
ViewController3.m:
#import "ViewController3.h"@implementation ViewController3- (void)viewDidLoad {[super viewDidLoad];UIButton *dismissButton = [UIButton buttonWithType:UIButtonTypeSystem];[dismissButton setTitle:@"Dismiss" forState:UIControlStateNormal];[dismissButton addTarget:self action:@selector(dismissViewController) forControlEvents:UIControlEventTouchUpInside];dismissButton.frame = CGRectMake(100, 300, 200, 50);[self.view addSubview:dismissButton];
}- (void)dismissViewController {[self.presentingViewController dismissViewControllerAnimated:YES completion:nil];
}@end
在这个示例中,控制器1包含一个按钮,点击后会present出控制器2。控制器2也包含一个按钮,点击后会present出控制器3。在控制器3中,点击按钮会通过dismiss方式逐级返回到前一个控制器,直到回到控制器1。
但是我们也可以用代码直接进行返回,这就要说到我们暑假自定义模态视图学习的关于presentedViewController以及presentingViewController的相关概念,即执行推出操作的上文来说为presentedViewController为被它推出的下文,执行推出操作的下文的presentingViewController为上文。
while循环越级返回
我已开始的设想是使用while循环,直到到达想要的控制器,我使用isKindOfClass的方法
- (void)touchesBegan:(NSSet<UITouch *> *)touches withEvent:(UIEvent *)event{UIViewController *currentViewController = self.presentingViewController;while (currentViewController) {if ([currentViewController isKindOfClass:[ViewController class]]) {// 找到所需的视图控制器ViewController *desiredViewController = (ViewController *)currentViewController;// 在这里执行dismiss操作[desiredViewController dismissViewControllerAnimated:YES completion:nil];break;}currentViewController = currentViewController.presentingViewController;}
}
实现的也是如下效果
 、
、
通知越级返回
可是这样直接进行遍历似乎还是有点麻烦,只要present的视图够多或者足够复杂的话,这样似乎会对性能造成一定的损伤,于是我用上了前段时间学习的通知传值来解决这个问题
- 在需要直接返回的地方发送通知,可以是任何一个视图控制器
[[NSNotificationCenter defaultCenter] postNotificationName:@"DirectReturnNotification" object:nil userInfo:@{@"targetViewController": @"ViewController1"}];
- 在需要响应直接返回的视图控制器中,监听通知并执行相应的返回操作。
[[NSNotificationCenter defaultCenter] addObserver:self selector:@selector(handle:) name:@"DirectReturnNotification" object:nil];
}- 接着写一下接受到通知之后的相关方法,我们这里用
targetViewController的字符串区别一下不同的控制器
- (void)handleDirectReturnNotification:(NSNotification *)notification {NSString *targetViewController = notification.userInfo[@"targetViewController"];if ([targetViewController isEqualToString:@"ViewController2"]) {[self dismissViewControllerAnimated:YES completion:nil];}
}- (void)handleDirectReturnNotification:(NSNotification *)notification {NSString *targetViewController = notification.userInfo[@"targetViewController"];if ([targetViewController isEqualToString:@"ViewController1"]) {[self dismissViewControllerAnimated:YES completion:nil];}
}
- 控制器3的完整代码如下
#import "ViewController3.h"@interface ViewController3 ()@end@implementation ViewController3- (void)viewDidLoad {[super viewDidLoad];self.view.backgroundColor = [UIColor greenColor];UIButton *returnButton1 = [UIButton buttonWithType:UIButtonTypeSystem];[returnButton1 setTitle:@"Direct Return to ViewController1" forState:UIControlStateNormal];[returnButton1 addTarget:self action:@selector(returnToViewController1) forControlEvents:UIControlEventTouchUpInside];returnButton1.frame = CGRectMake(100, 300, 200, 50);[self.view addSubview:returnButton1];UIButton *returnButton = [UIButton buttonWithType:UIButtonTypeSystem];[returnButton setTitle:@"Direct Return to ViewController2" forState:UIControlStateNormal];[returnButton addTarget:self action:@selector(returnToViewController2) forControlEvents:UIControlEventTouchUpInside];returnButton.frame = CGRectMake(100, 500, 200, 50);[self.view addSubview:returnButton];
}
- (void)returnToViewController1 {// 发送通知,指示需要直接返回到ViewController1[[NSNotificationCenter defaultCenter] postNotificationName:@"DirectReturnNotification" object:nil userInfo:@{@"targetViewController": @"ViewController1"}];
}
- (void)returnToViewController2 {// 发送通知,指示需要直接返回到ViewController1[[NSNotificationCenter defaultCenter] postNotificationName:@"DirectReturnNotification" object:nil userInfo:@{@"targetViewController": @"ViewController2"}];
}@end
完整示例如下
注:在学习过程之中,我又了解到如果使用消息传值的方法去实现直接跳转的方法,会提高那个代码的耦合性,那这个越级直接dismiss的方法可能需要我们通过实际运用的情况来选择我们需要的方法
添加present动画
在present的过程之中我们也可以添加我们想要的动画使得present的过程更加流畅,这段代码我们放在视图即将present的操作之前,并且取消present操作之中允许动画的属性。
CATransition * transition = [CATransition animation];transition.type = @"moveOut";transition.subtype = @"fromCenter";transition.duration = 0.3;//移除当前window的layer层的动画[self.view.window.layer removeAllAnimations];//将定制好的动画添加到当前控制器window的layer层[self.view.window.layer addAnimation:transition forKey:nil];ViewController3 *vc3 = [[ViewController3 alloc] init];[self presentViewController:vc3 animated:NO completion:nil];
效果如下
push
push就是我们在栈之中操作push,因此我们可以知道这个操作跳转的控制器,实际上就是用一个类似栈的结构去存储这些个控制器,接下来是一个代码示例
ViewController* vc = [[ViewController4 alloc] init];
[self.navigationController pushViewController:vc animated:YES];
我们可以看到,与present操作不同,我们是使用导航控制器(即self.navigationController)来实现push的方法,我们使用push的方法将当前的控制器推进导航控制器之中栈,这个栈我们可以通过self.navigationController的属性来找到
self.navigationController.viewControllers
对应的消失视图的方法为pop方法如下
[self.navigationController popViewControllerAnimated:YES];
但是和present的另一个不同点,由于使用一个数组模拟栈,所以我们其实可以很容易拿到对应层的控制器,即pop是可以不逐级返回的
[self.navigationController popToRootViewControllerAnimated:YES];//直接返回到根视图
[self.navigationController popToViewController:viewController animated:YES];//返回指定的某一层视图控制器
在关于返回指定的某一层之中,我们可以较为简单的访问导航控制器的栈的下标self.navigationController.viewControllers[i],或者使用在present处的方法使用isKindOfClass来找到对应的controller
对应代码功能在此不多做赘述,贴出以供参考:
- ViewController1
#import "ViewController1.h"
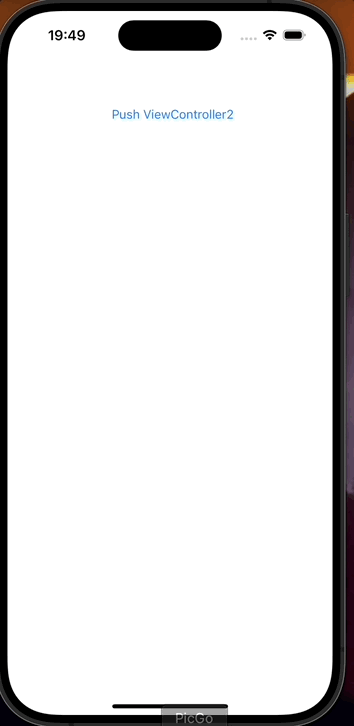
#import "ViewController2.h"@implementation ViewController1- (void)viewDidLoad {[super viewDidLoad];UIButton *pushButton = [UIButton buttonWithType:UIButtonTypeSystem];[pushButton setTitle:@"Push to ViewController2" forState:UIControlStateNormal];[pushButton addTarget:self action:@selector(pushToViewController2) forControlEvents:UIControlEventTouchUpInside];pushButton.frame = CGRectMake(100, 300, 200, 50);[self.view addSubview:pushButton];
}- (void)pushToViewController2 {ViewController2 *viewController2 = [[ViewController2 alloc] init];[self.navigationController pushViewController:viewController2 animated:YES];
}@end
- ViewController2
#import "ViewController2.h"
#import "ViewController3.h"@implementation ViewController2- (void)viewDidLoad {[super viewDidLoad];UIButton *pushButton = [UIButton buttonWithType:UIButtonTypeSystem];[pushButton setTitle:@"Push to ViewController3" forState:UIControlStateNormal];[pushButton addTarget:self action:@selector(pushToViewController3) forControlEvents:UIControlEventTouchUpInside];pushButton.frame = CGRectMake(100, 300, 200, 50);[self.view addSubview:pushButton];
}- (void)pushToViewController3 {ViewController3 *viewController3 = [[ViewController3 alloc] init];[self.navigationController pushViewController:viewController3 animated:YES];
}@end
- ViewController3
#import "ViewController3.h"@implementation ViewController3- (void)viewDidLoad {[super viewDidLoad];self.view.backgroundColor = [UIColor greenColor];
}- (void)touchesBegan:(NSSet<UITouch *> *)touches withEvent:(UIEvent *)event {[self.navigationController popToRootViewControllerAnimated:YES];
}@end
模态视图和push视图混合跳转
简单了解了push和present的相关操作,我们实际应该当中都会
操作一:控制器Apresent控制器B,控制器B再将控制器Cpush出来
似乎这个操作很简单,我一开始就写出了以下代码
ViewController1.h:
#import <UIKit/UIKit.h>@interface ViewController1 : UIViewController@end
ViewController1.m:
#import "ViewController1.h"
#import "ViewController2.h"@implementation ViewController1- (void)viewDidLoad {[super viewDidLoad];UIButton *presentButton = [UIButton buttonWithType:UIButtonTypeSystem];[presentButton setTitle:@"Present ViewController2" forState:UIControlStateNormal];[presentButton addTarget:self action:@selector(presentViewController2) forControlEvents:UIControlEventTouchUpInside];presentButton.frame = CGRectMake(100, 100, 200, 50);[self.view addSubview:presentButton];
}- (void)presentViewController2 {ViewController2 *vc2 = [[ViewController2 alloc] init];[self presentViewController:vc2 animated:YES completion:nil];
}@end
ViewController2.h:
#import <UIKit/UIKit.h>@interface ViewController2 : UIViewController@end
ViewController2.m:
#import "ViewController2.h"
#import "ViewController3.h"@implementation ViewController2- (void)viewDidLoad {[super viewDidLoad];UIButton *pushButton = [UIButton buttonWithType:UIButtonTypeSystem];[pushButton setTitle:@"Push ViewController3" forState:UIControlStateNormal];[pushButton addTarget:self action:@selector(pushViewController3) forControlEvents:UIControlEventTouchUpInside];pushButton.frame = CGRectMake(100, 200, 200, 50);[self.view addSubview:pushButton];
}- (void)pushViewController3 {ViewController3 *vc3 = [[ViewController3 alloc] init];[self.navigationController pushViewController:vc3 animated:YES];
}@end
ViewController3.h:
#import <UIKit/UIKit.h>@interface ViewController3 : UIViewController@end
ViewController3.m:
#import "ViewController3.h"@implementation ViewController3- (void)viewDidLoad {[super viewDidLoad];self.view.backgroundColor = [UIColor yellowColor];
}@end
但是当我们进行尝试的时候就会发现,在模态视图之中没有办法直接将控制器push出来,十分奇怪,而后查询了相关资料,因为我们实现push的操作需要使用导航栏控制器,而对于控制器2来说它自己只是作为模态视图被临时present出来,它并没有对应的导航栏控制器可以实现push操作,那其实解决方法很简单,我们在控制器2在推出的时候用一个导航栏控制器包装一下即可,即在控制器1之中修改,控制器3即可被正确的push出来
- (void)presentViewController2 {ViewController2 *vc2 = [[ViewController2 alloc] init];UINavigationController *nav2 = [[UINavigationController alloc] initWithRootViewController:vc2];[self presentViewController:nav2 animated:YES completion:nil];
}

注:如果我们想直接返回控制器1,只需要在控制器3之中使用一下方法即可:
[self.navigationController dismissViewControllerAnimated:YES completion:nil];
操作二:控制器1push出控制器2,控制器2present控制器3,使用代理直接返回控制器1
在 iOS 开发中,如果您想要在控制器3中直接返回到控制器1,可以使用代理模式或者闭包回调来实现。下面是一个简单的示例,演示了如何在控制器3中通过代理模式实现直接返回到控制器1的操作。
- ViewController1
#import "ViewController2.h"
#import "ViewController3.h"
#import "returnDelegate.h"
@interface ViewController2 ()<returnDelegate>@end@implementation ViewController1- (void)viewDidLoad {[super viewDidLoad];UIButton *pushButton = [UIButton buttonWithType:UIButtonTypeSystem];[pushButton setTitle:@"Push to ViewController2" forState:UIControlStateNormal];[pushButton addTarget:self action:@selector(pushToViewController2) forControlEvents:UIControlEventTouchUpInside];pushButton.frame = CGRectMake(100, 300, 200, 50);[self.view addSubview:pushButton];
}- (void)pushToViewController2 {ViewController2 *viewController2 = [[ViewController2 alloc] init];[self.navigationController pushViewController:viewController2 animated:YES];
}@end
- ViewController2
#import "ViewController2.h"
#import "ViewController3.h"@implementation ViewController2- (void)viewDidLoad {[super viewDidLoad];UIButton *presentButton = [UIButton buttonWithType:UIButtonTypeSystem];[presentButton setTitle:@"Present ViewController3" forState:UIControlStateNormal];[presentButton addTarget:self action:@selector(presentViewController3) forControlEvents:UIControlEventTouchUpInside];presentButton.frame = CGRectMake(100, 300, 200, 50);[self.view addSubview:presentButton];
}- (void)presentViewController3 {ViewController3 *viewController3 = [[ViewController3 alloc] init];viewController3.delegate = self;UINavigationController *navController = [[UINavigationController alloc] initWithRootViewController:viewController3];[self presentViewController:navController animated:YES completion:nil];
}- (void)returnToViewController1 {[self.navigationController popToRootViewControllerAnimated:YES];
}@end
- ViewController3
#import "ViewController3.h"
#import "ViewController2.h"
@interface ViewController3 ()
@property(nonatomic, weak) ViewController2 *delegate;
@end@implementation ViewController3- (void)viewDidLoad {[super viewDidLoad];self.view.backgroundColor = [UIColor greenColor];UIButton *returnButton = [UIButton buttonWithType:UIButtonTypeSystem];[returnButton setTitle:@"Return to ViewController1" forState:UIControlStateNormal];[returnButton addTarget:self action:@selector(returnToViewController1) forControlEvents:UIControlEventTouchUpInside];returnButton.frame = CGRectMake(100, 300, 200, 50);[self.view addSubview:returnButton];
}- (void)returnToViewController1 {if (self.delegate && [self.delegate respondsToSelector:@selector(returnToViewController1)]) {[self.delegate returnToViewController1];[self dismissViewControllerAnimated:NO completion:nil];}
}@end
- retrunDelegate
#ifndef returnDelegate_h
#define returnDelegate_h
@class ViewController2;@protocol returnDelegate <NSObject>- (void)returnToViewController1;@end
在这个示例中,ViewController2通过present方式展示ViewController3,并在ViewController2中实现了一个代理方法returnToViewController1,用来返回到ViewController1。在ViewController3中点击按钮后,会通过代理将操作传递给ViewController2,从而实现直接返回到ViewController1的功能。

总结
本文总结了present和push的相关区别以及如何去实现push和present如何在有需求是实现混合转场的操作。